NB - Jacking Points and Stand Locations
These are some basic instructions for lifting an NB Miata and safely placing it on jack stands. There is also a great article by Timothy Metzinger that explains the same process in a slightly different way. The pictures are of my NA Miata, but it’s basically the same thing.
I use a low-profile 2-ton floor jack and four 2-ton jack stands, which have worked well for my needs. I also purchased a set of rubber jack stand pads to fit between the tops of the stands and the car for a little added protection. If your car is lowered at all, you will want to use a low profile jack. My previous jack was not low enough to fit under the car and my NA is only about 10mm lower than normal.
Where to Place the Jack Stands
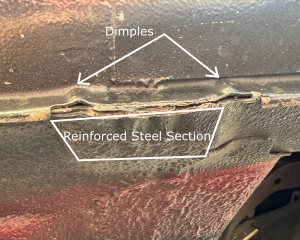
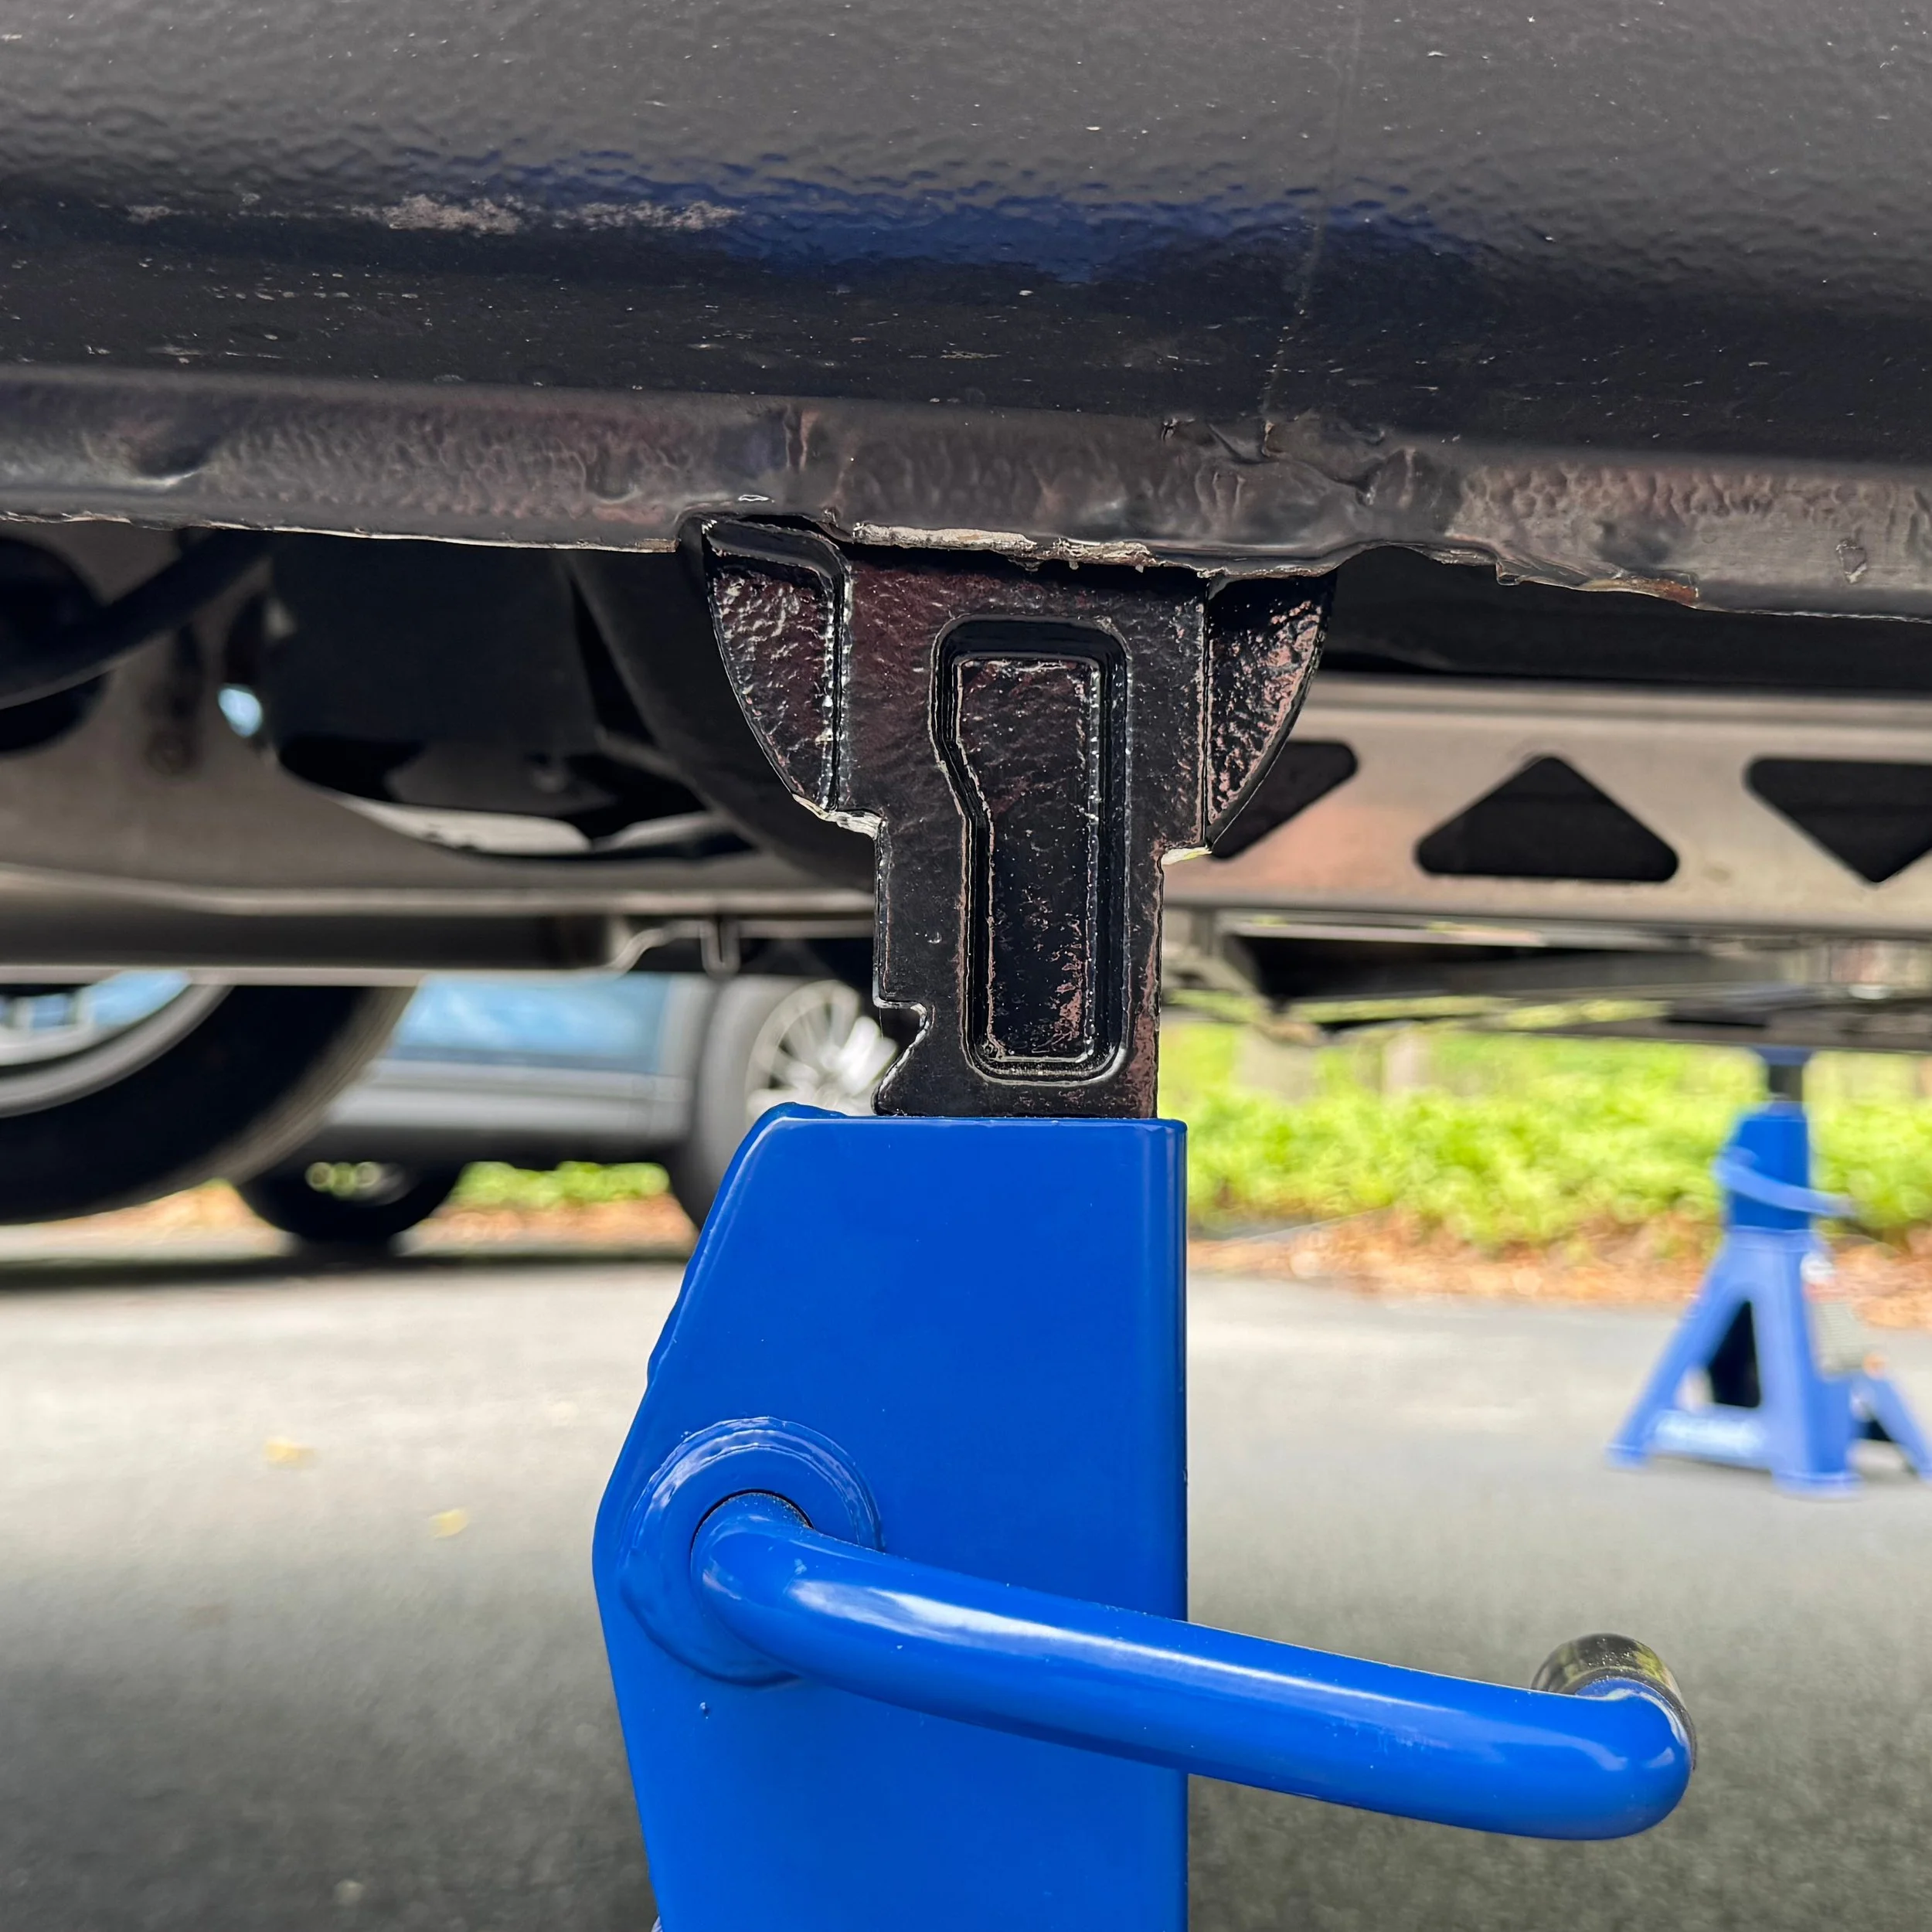
The NB has a rocker panel pinch weld that runs the length of the car on each side, between the wheels. Towards the front and rear of the pinch weld, there are sets of two dimples that mark the factory jack points. Directly behind each of the sets of dimples, is a reinforced, multi-layered, textured steel section (approximately 3”x1”) that is suitable for placing jack stands. I would recommend using rubber jack stand pads to protect the car’s paint.
Where to Place the Jack
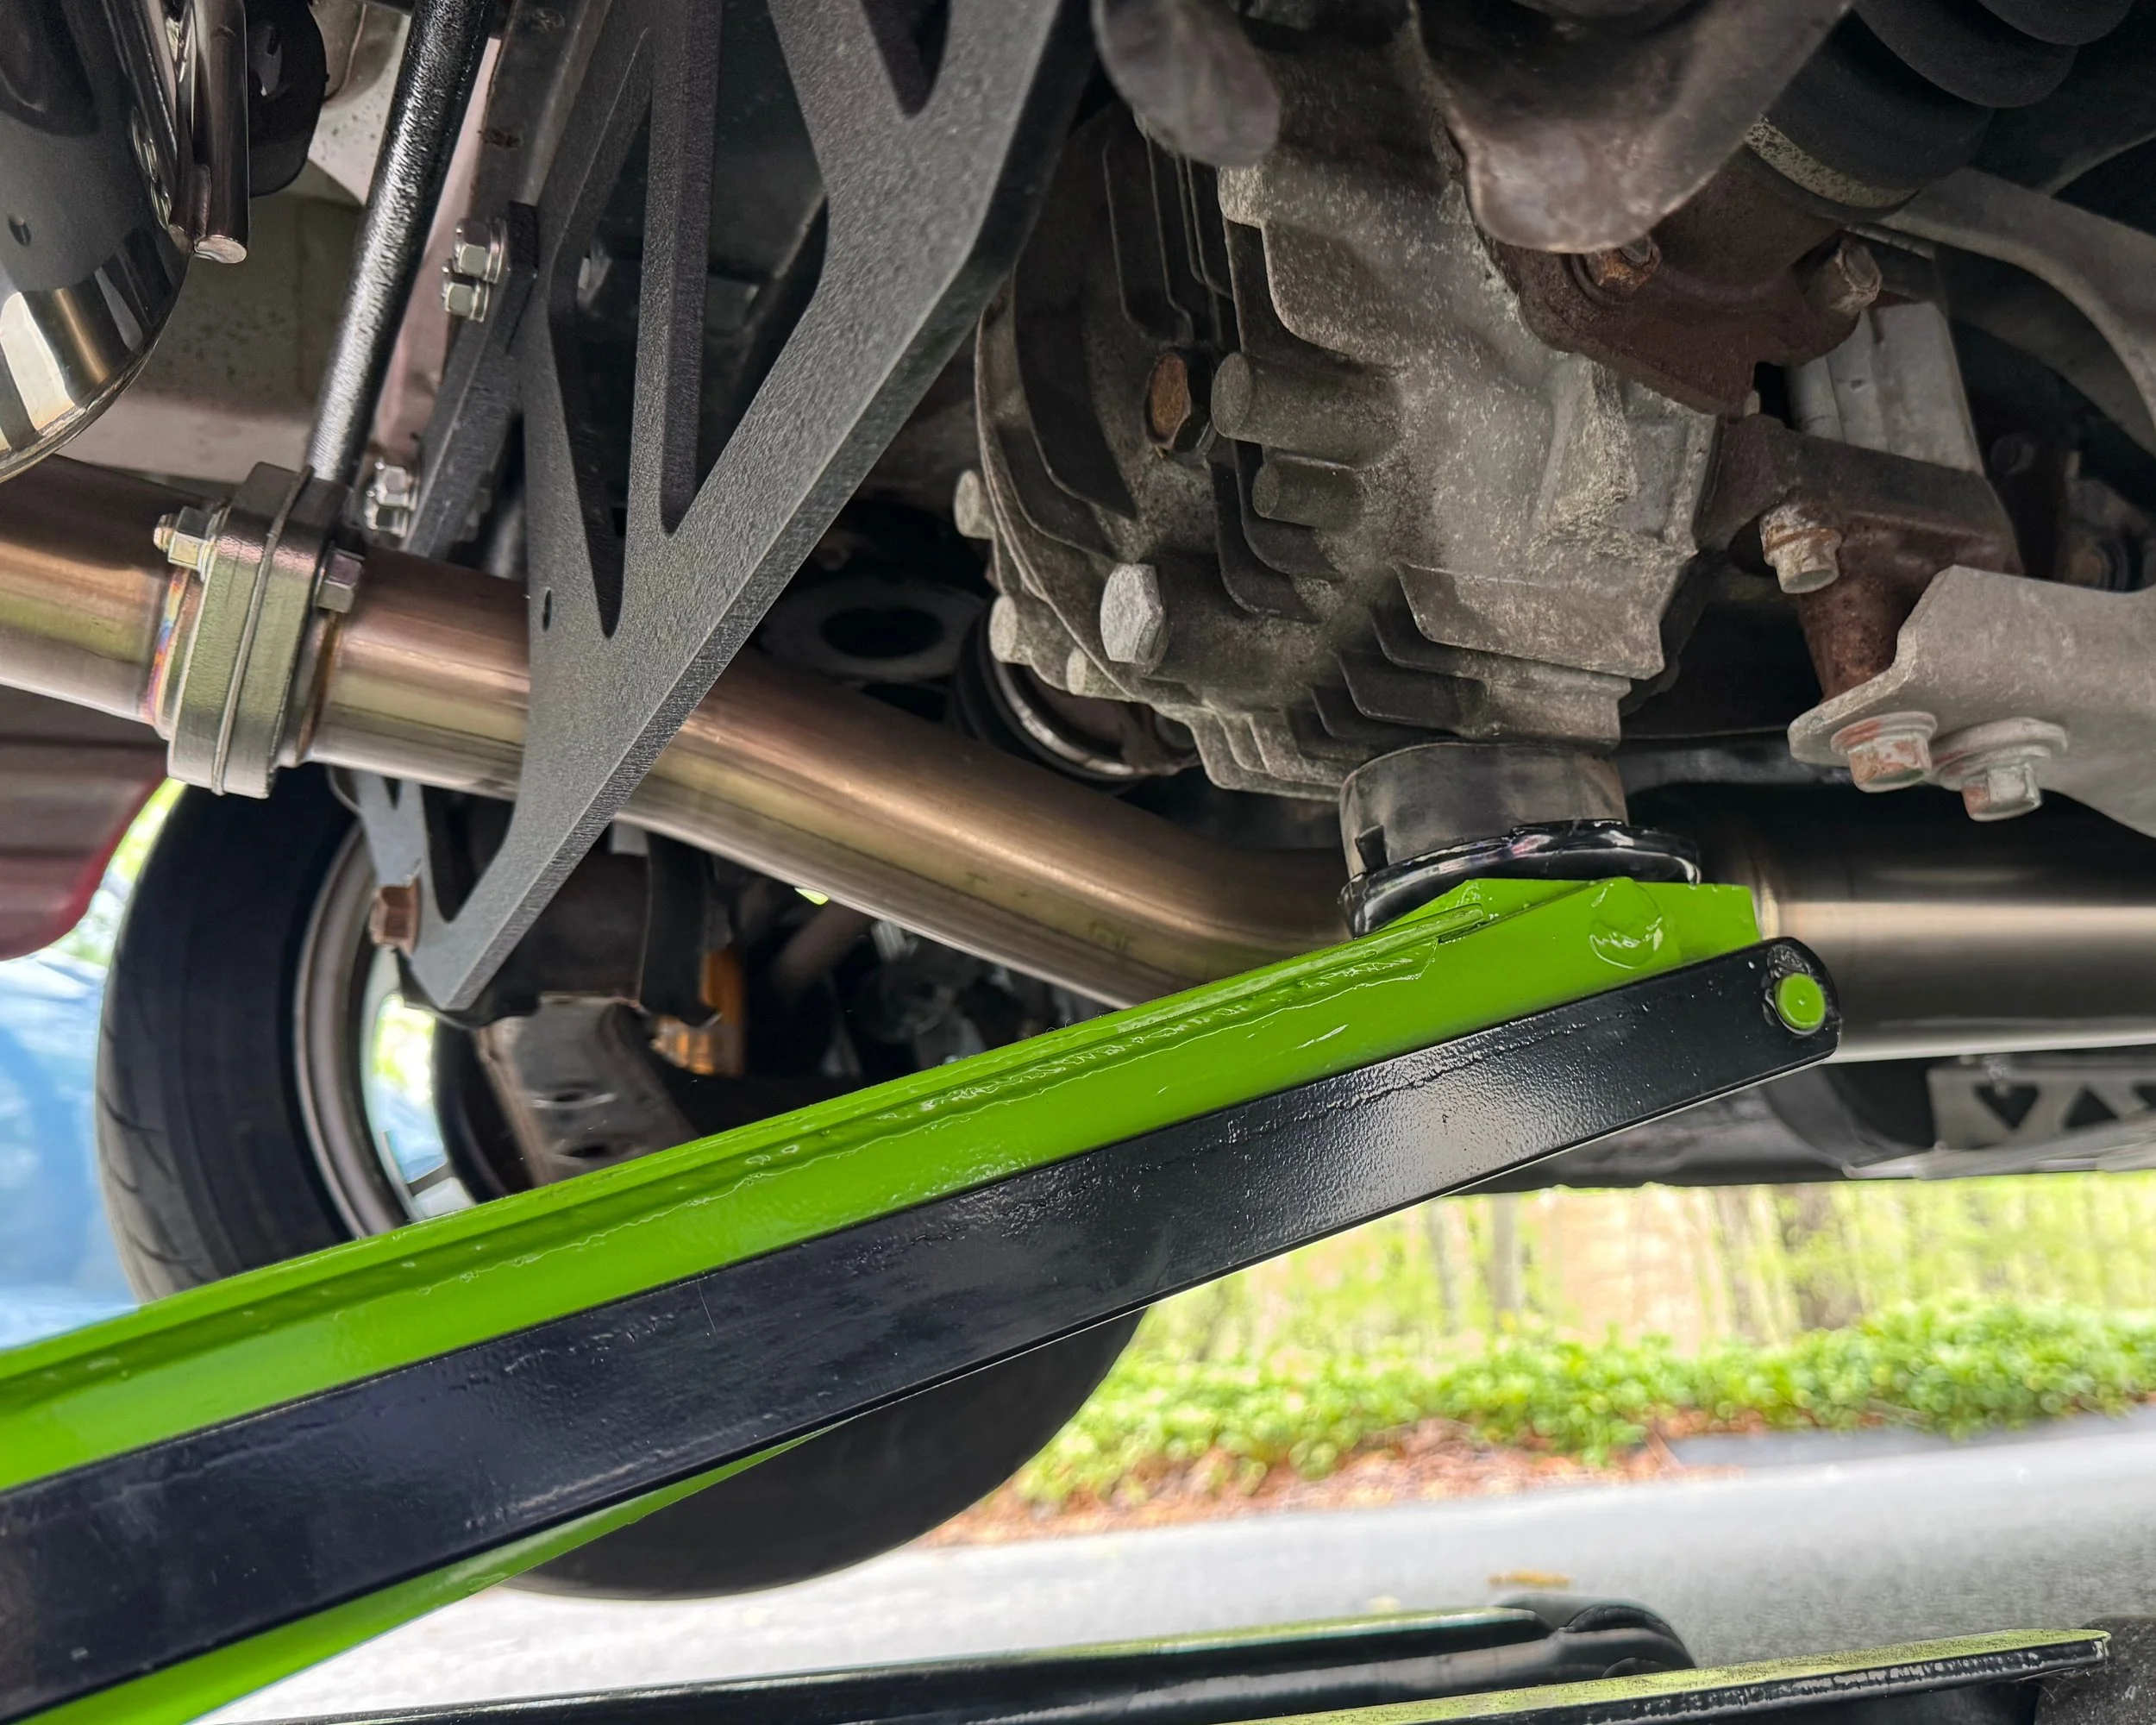
At the rear of the car, you can use the differential* as a lifting point. Place the jack under the large flat fins at the bottom, avoiding the thin cooling fins that could bend under load. I use a rubber jack pad to provide a boundary between the car and the hard jack surface.
*Some people have reported issues using the differential to lift the car, but I haven’t had any problems.
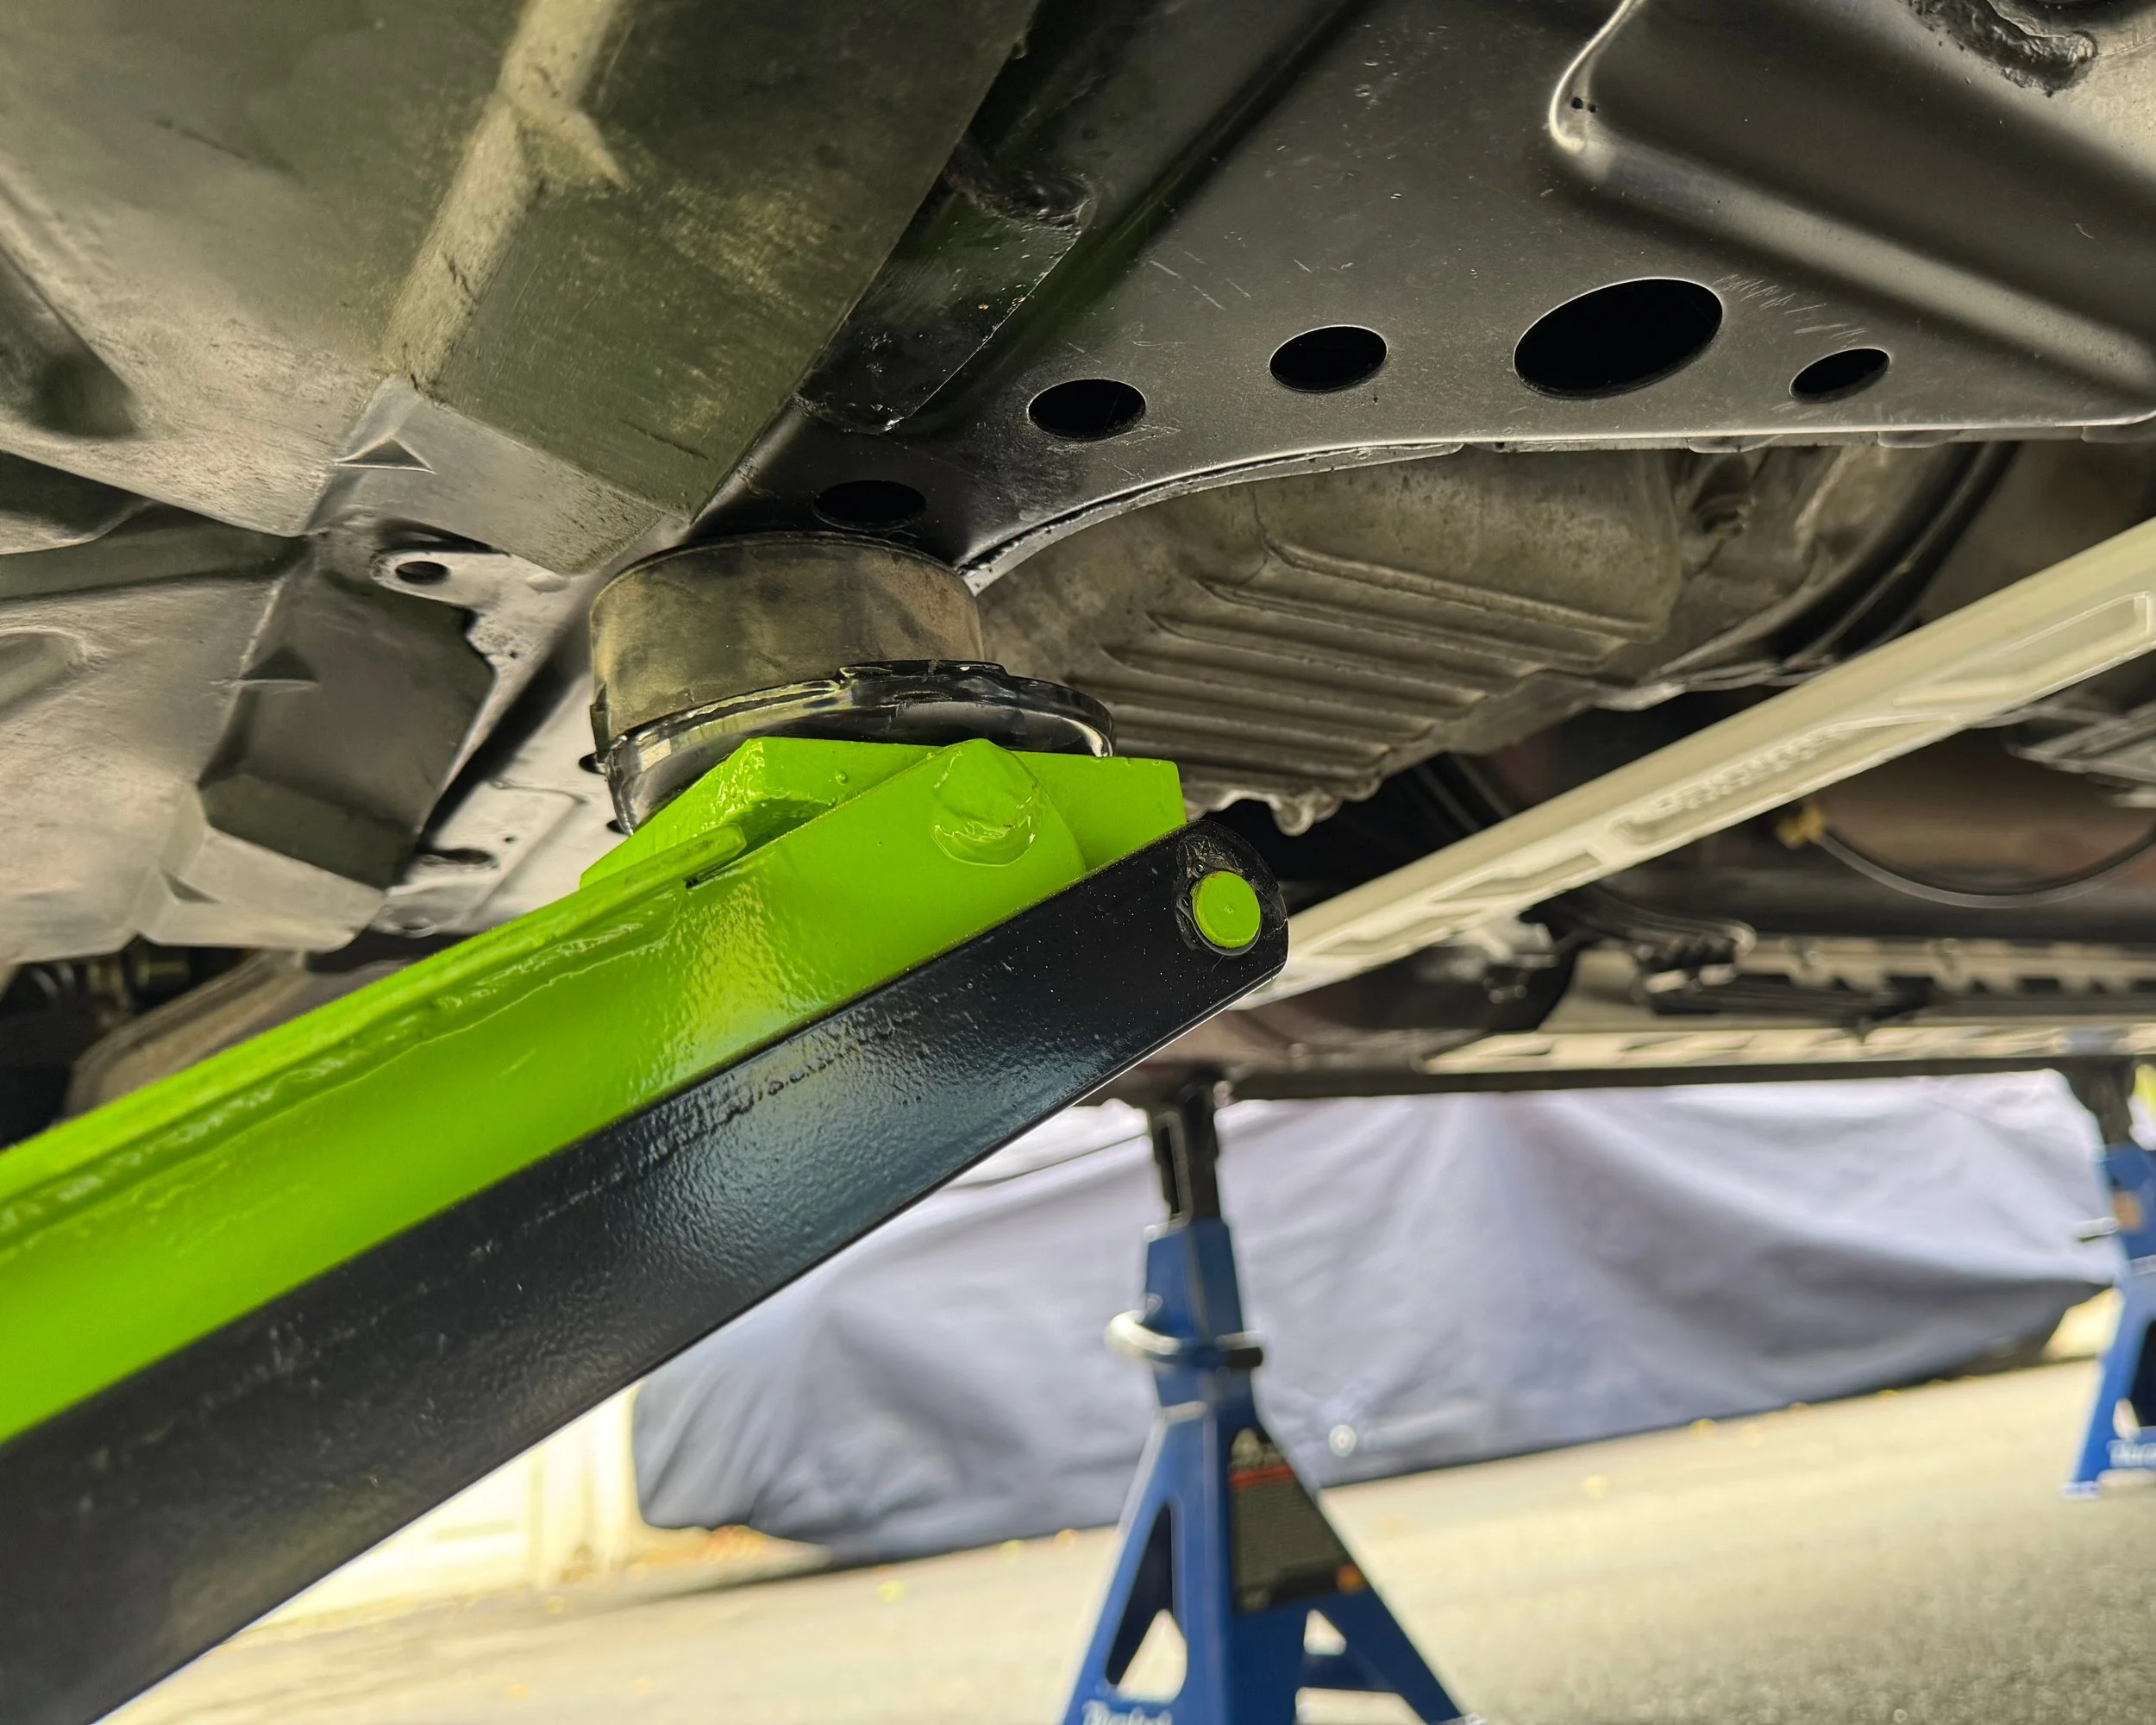
At the front of the car, there is a thick metal structure just behind the plastic engine splash shield and in front of the old pan. This structure is suitable for lifting the front end of the car. Place the jack as close to the center of the structure as possible, keeping it away from the splash shield.
Lifting sequence
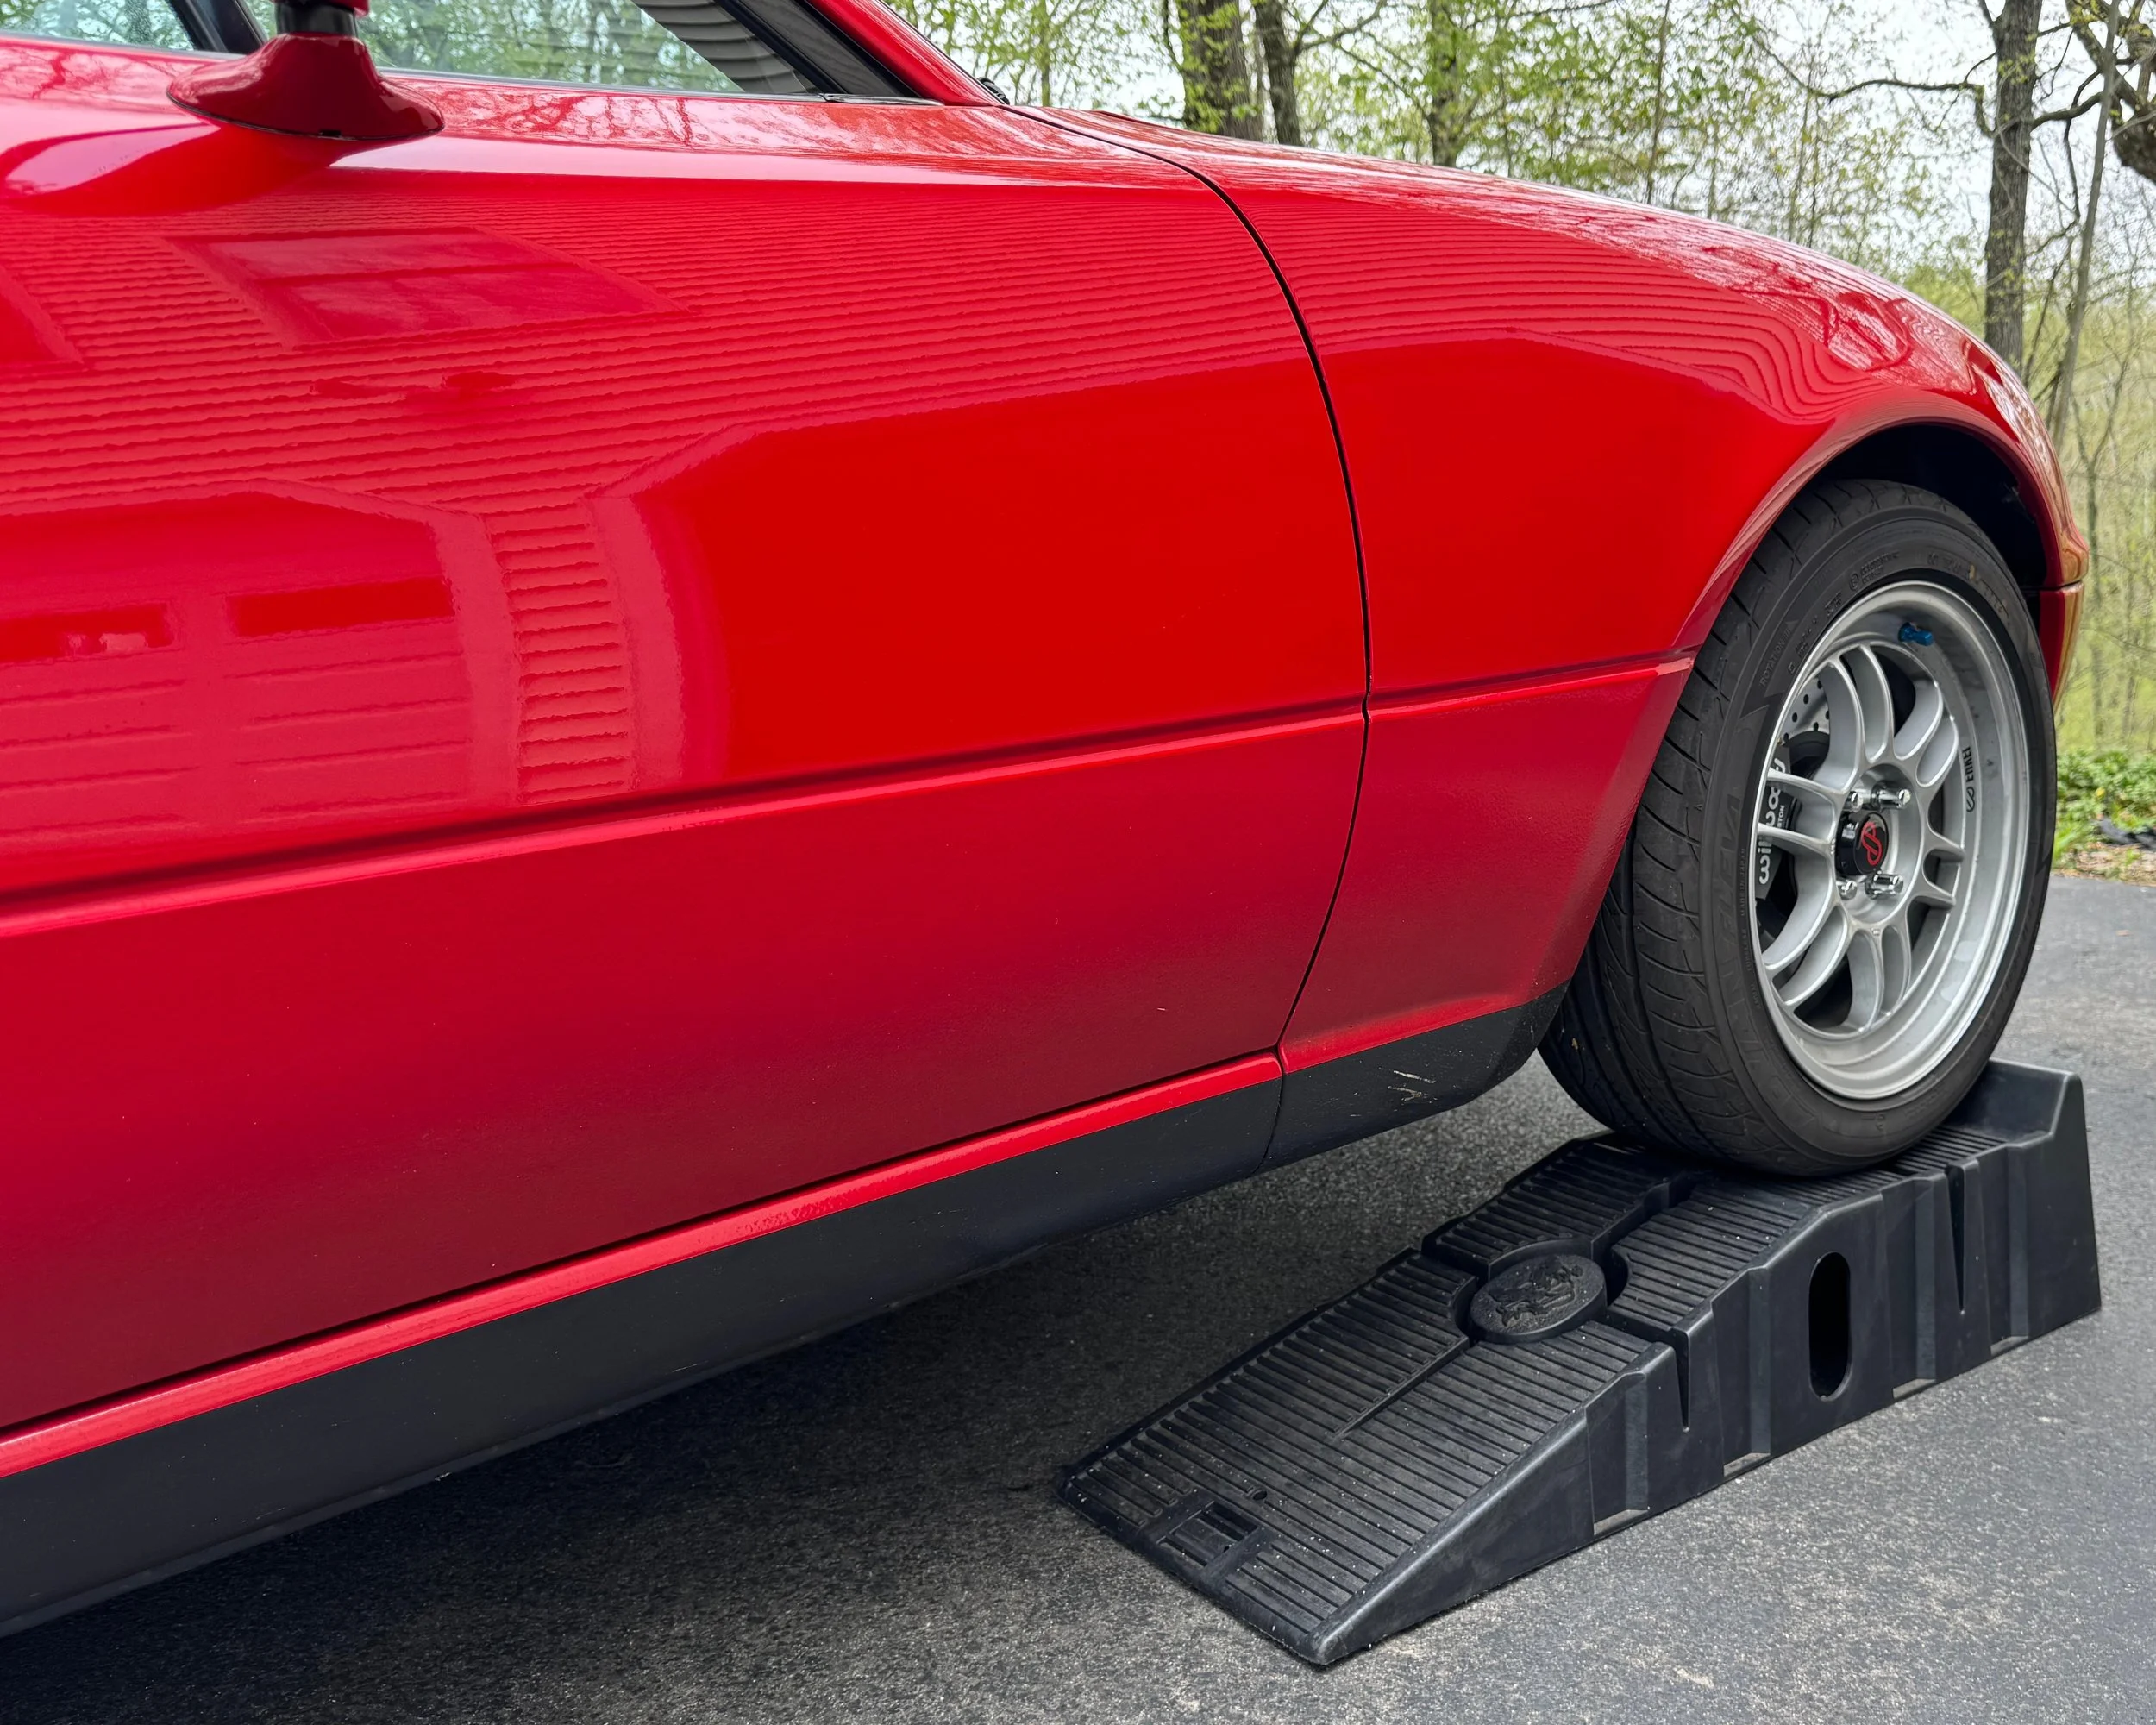
Step 1: Drive one end of the car up on ramps. This prevents too much pivoting on the jack stands as the car is raised. It’s a good idea to back on to the ramps because the parking brake will keep the car from rolling*. I typically drive the front wheels up on the ramps, because I can’t get the jack under the front of the car when the rear is raised.
*I once had a car roll off the ramps as I was jacking it up. I was able to stop it before anything terrible happened, but it could have been a huge disaster. You’ve been warned.
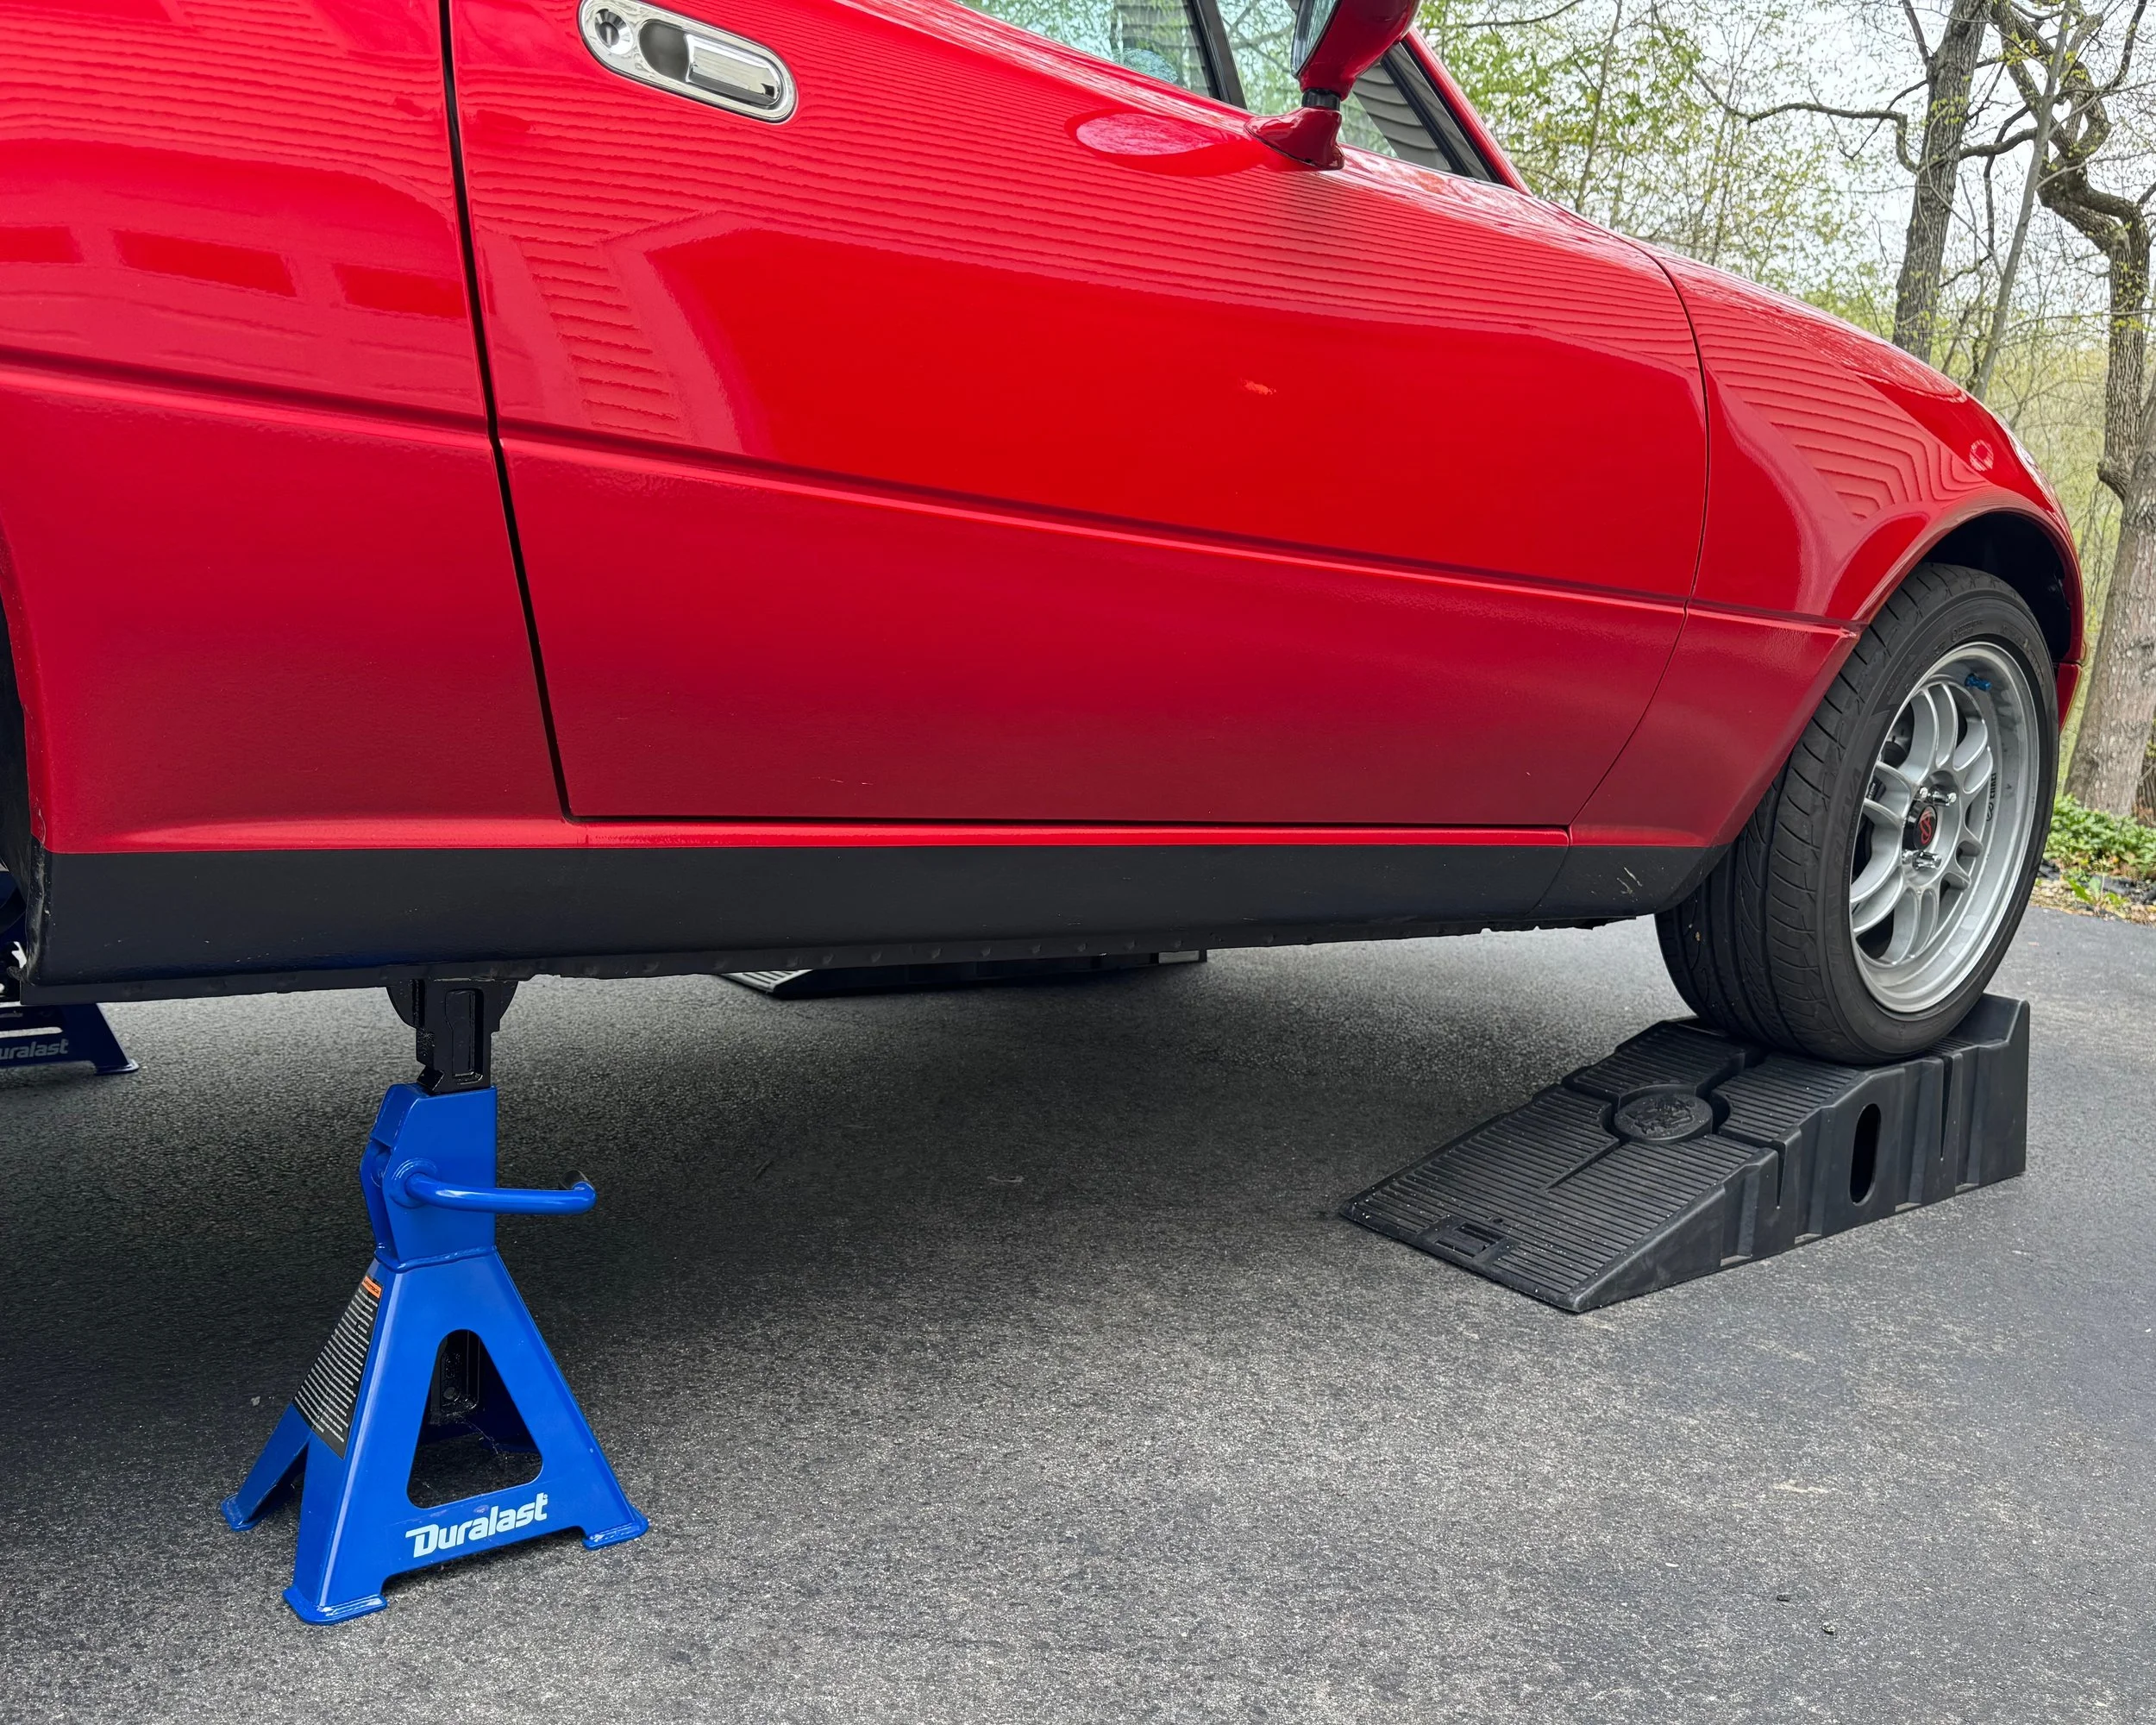
Step 2: Raise the other end of the car using the jacking points listed above. Place a jack stand on each side of the car, positioning them on the reinforced, textured steel section just behind the pinch weld. The reinforced section is located directly behind each set of dimples.
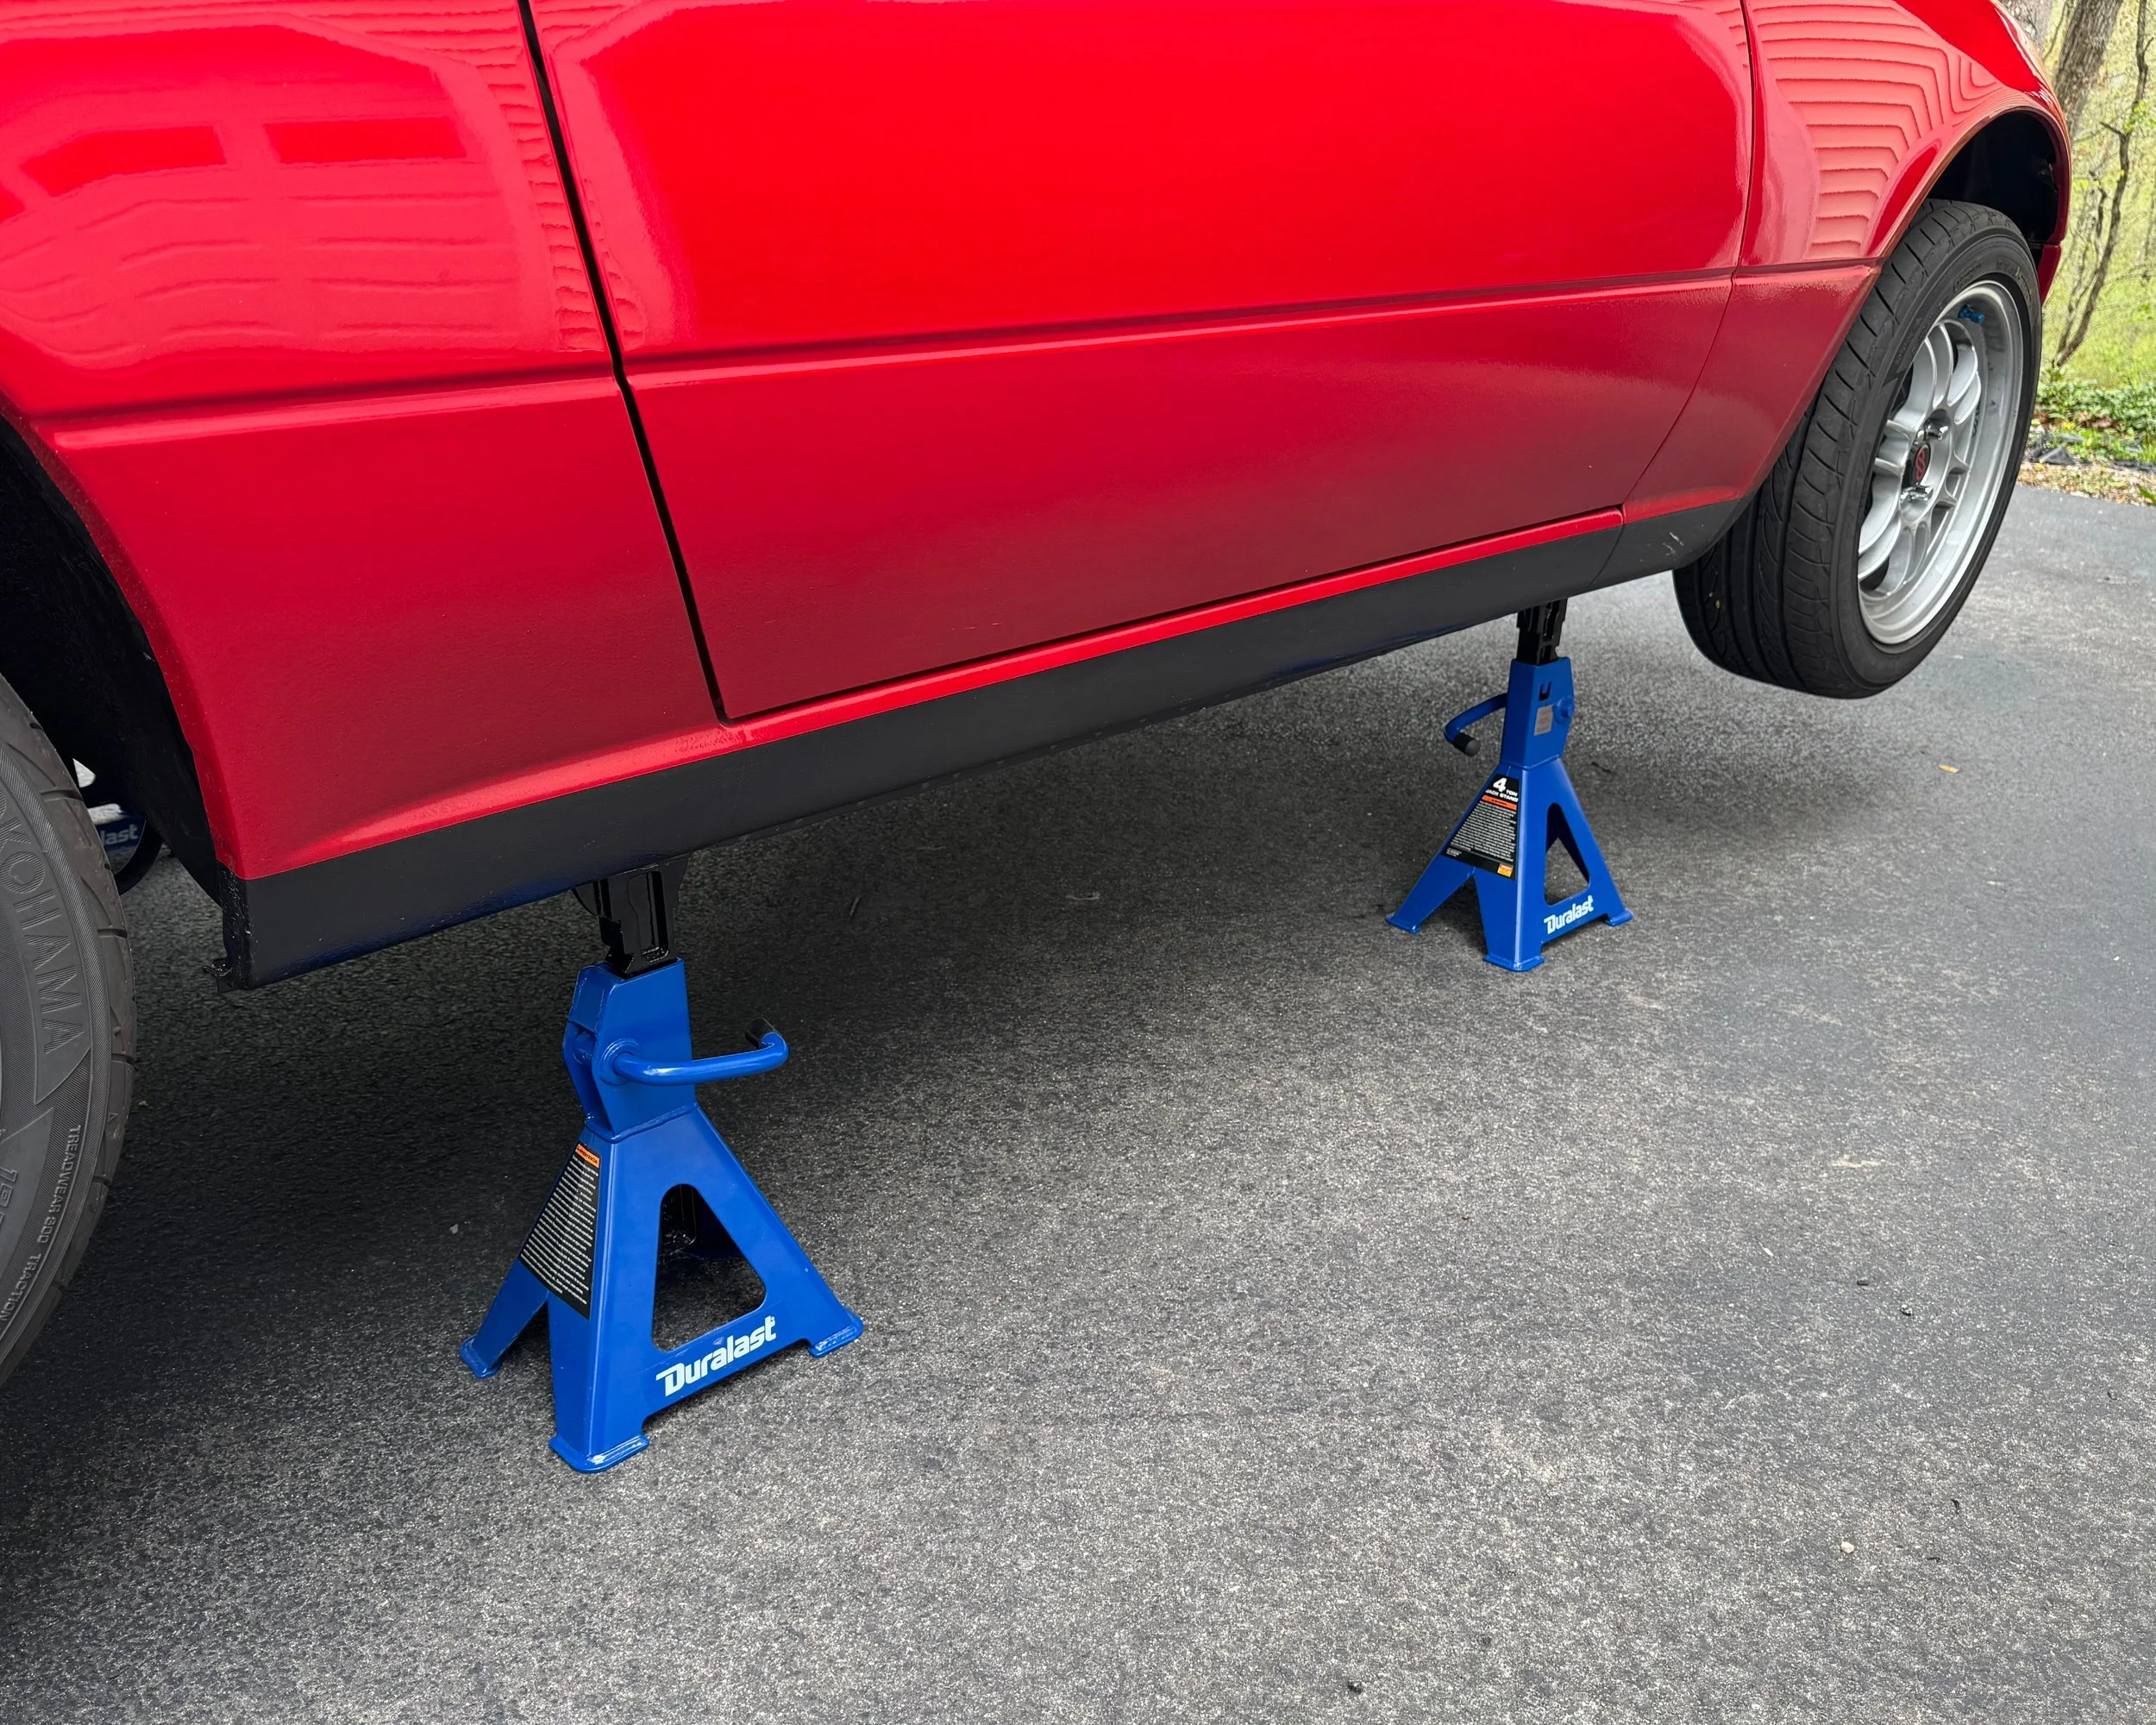
Step 3: Raise the car off the ramps using the jacking points listed above. Remove the ramps before placing the jack stands. Place a jack stand on each side of the car, positioning them on the reinforced, textured steel section just behind the pinch weld. The reinforced section is located directly behind each set of dimples.
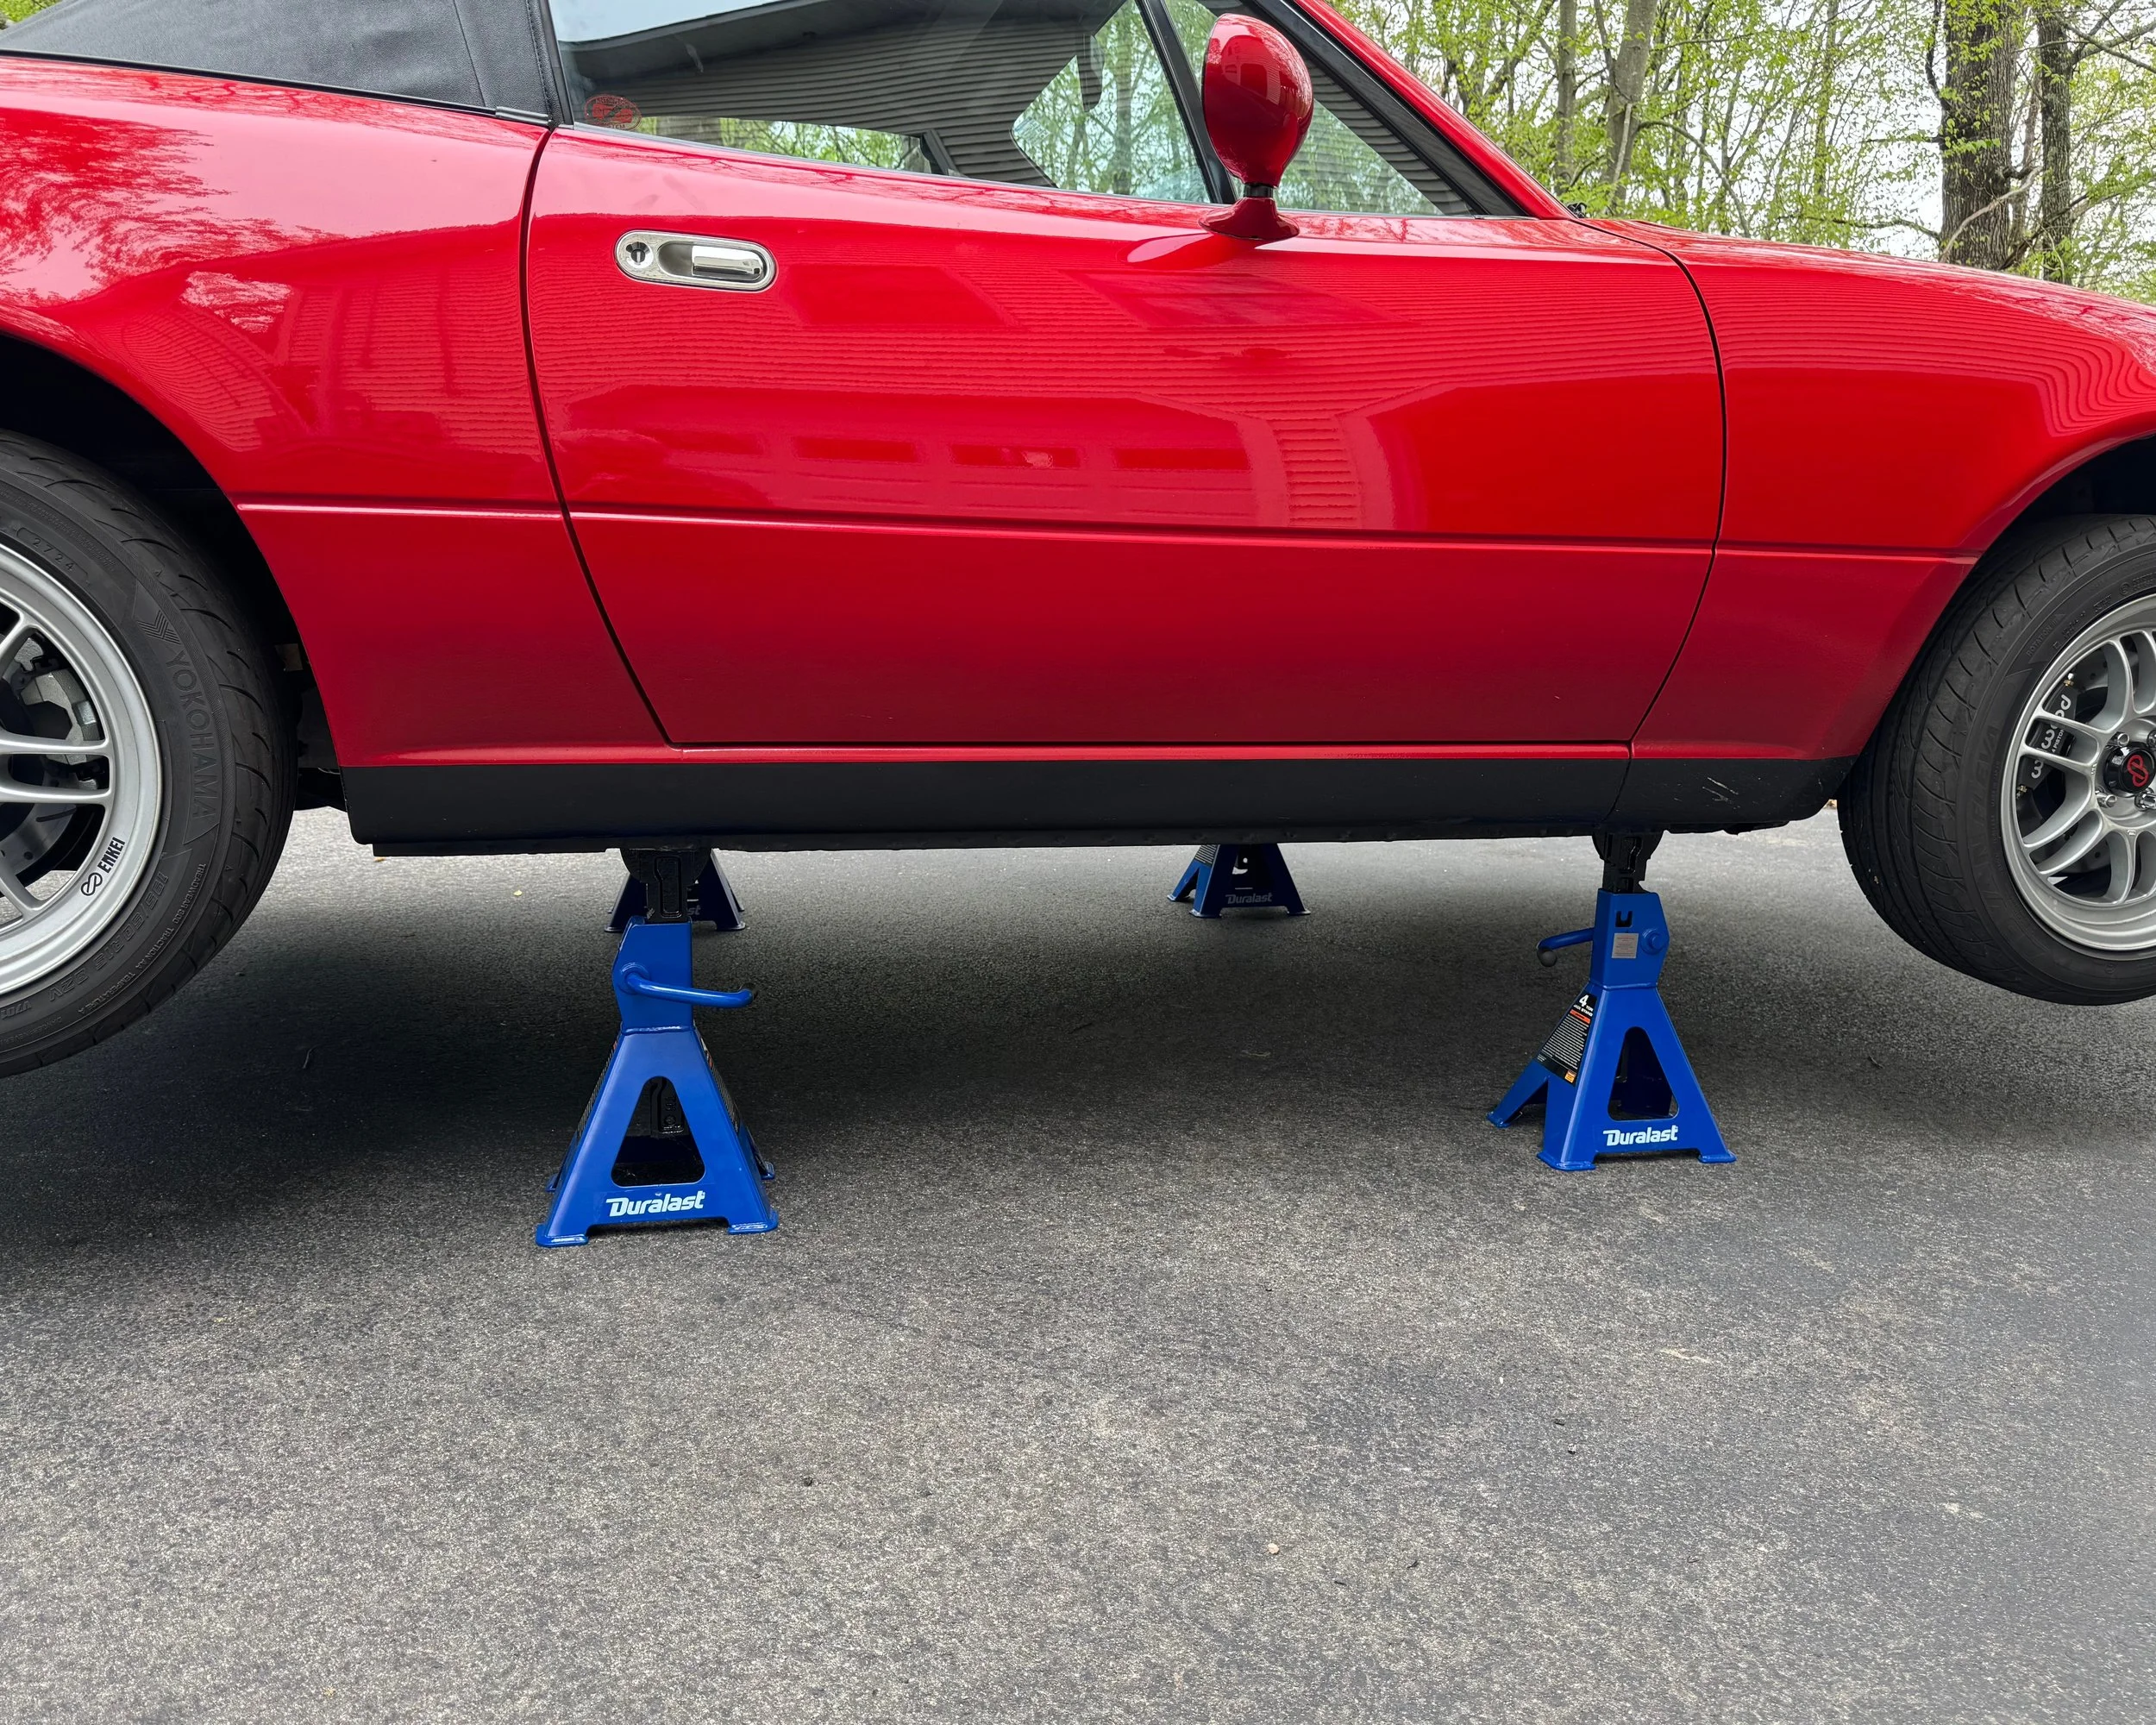
Step 4: Make sure the car is stable and secure, especially before doing any work underneath the car. You can also add additional stands, if you have them.
That’s it. I was nervous at first, but now it’s second nature. To lower the car, just reverse these steps. (ie 1) Lower the one side onto the ramps, 2) Lower the other side to the ground, 3) Drive off the ramps.)
Please be careful and make sure the car is completely stable on the stands before doing any work under the car. No one needs to be crushed under an improperly secured car. If you must put the front end of the car up on ramps, please secure it so the car won't roll.